
目次
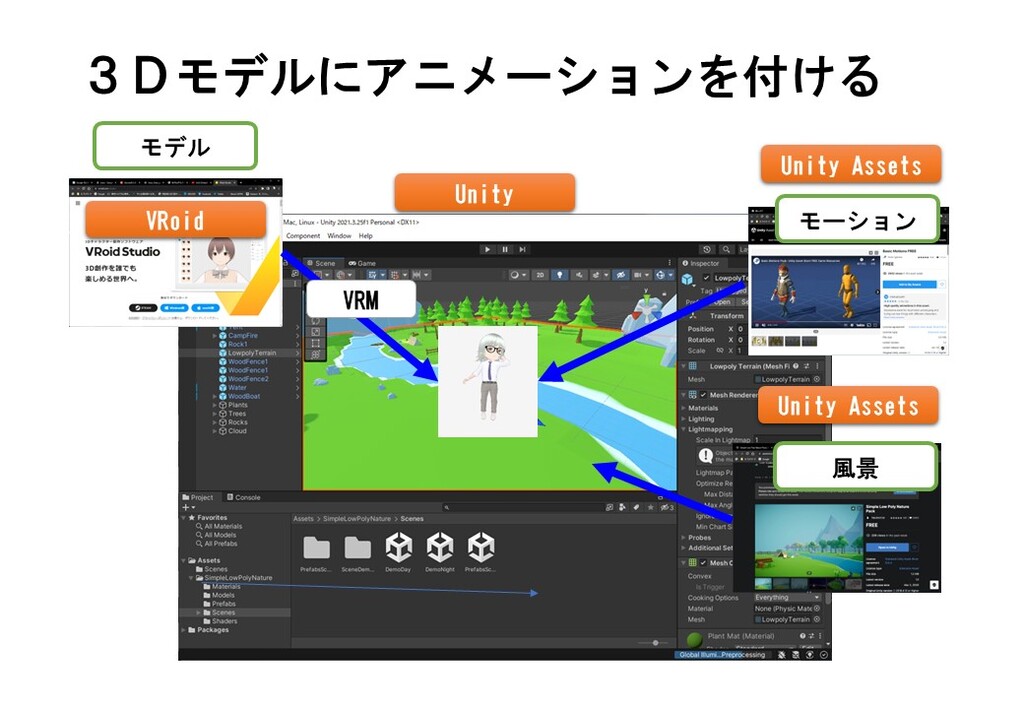
VroidのアバターをUnityで動かす
VRoidで作成したアバターをUnityで動かします。
背景とモーションは、Unity Assetsからダウンロードし、VRoidで作成して、VRM書式で取り込んだアバーターを動かします。アバターを動かすScriptは、C#で作成しました。
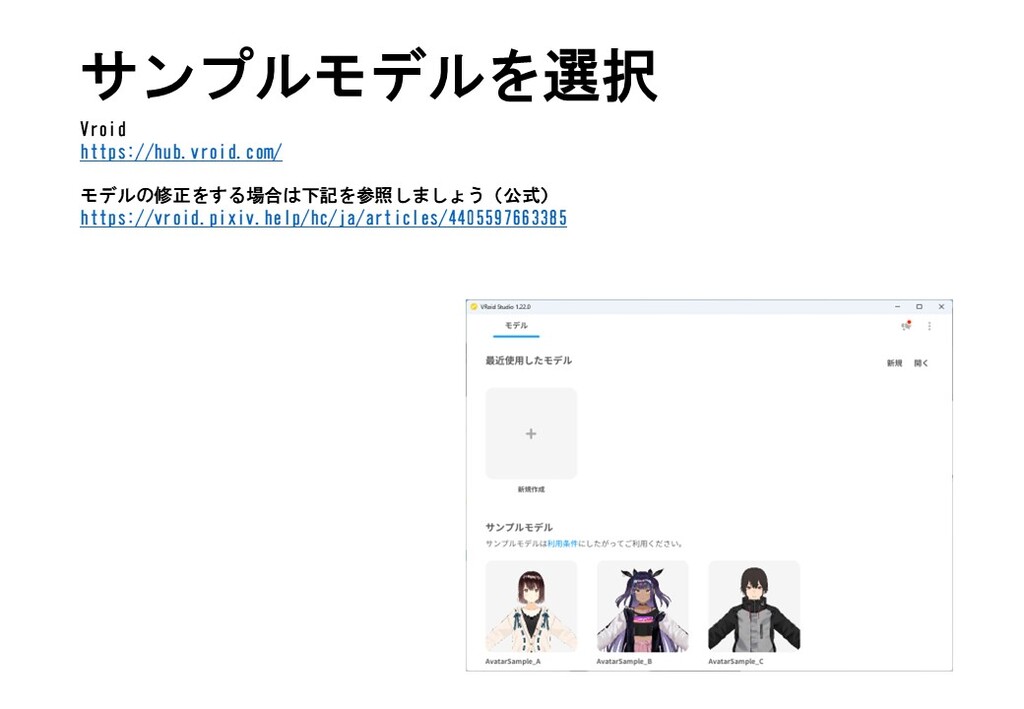
VRoidでアバターを作成する
Unityで取り込みできる3Dモデルを作ります。
アバターの作成方法をこちらを参考にしてください
あわせて読みたい

アバターを作ってVRサイトで使う
メタバースサイト(Cluster)に自分で作ったアバターで参加しましょう アバターの作成には、VRoidを使います。 https://www.youtube.com/watch?v=E7_VVcy3iJk 【VRサ...
Vroid
VRoid Hub

VRoid Hub
VRoid Hubは、3Dキャラクターのための投稿・共有プラットフォームです。モデルデータをアップロードするだけでキャラクターが活き活きとアニメーションするプロフィールペ...
サンプルモデルを選択します。
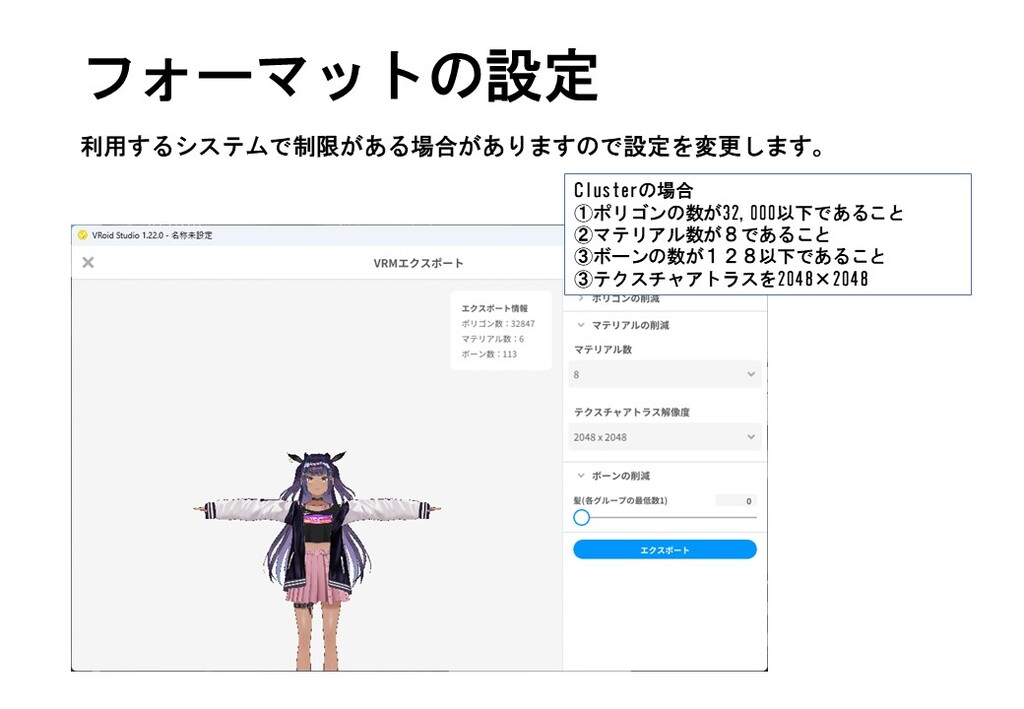
VRM書式でエクスポートします。
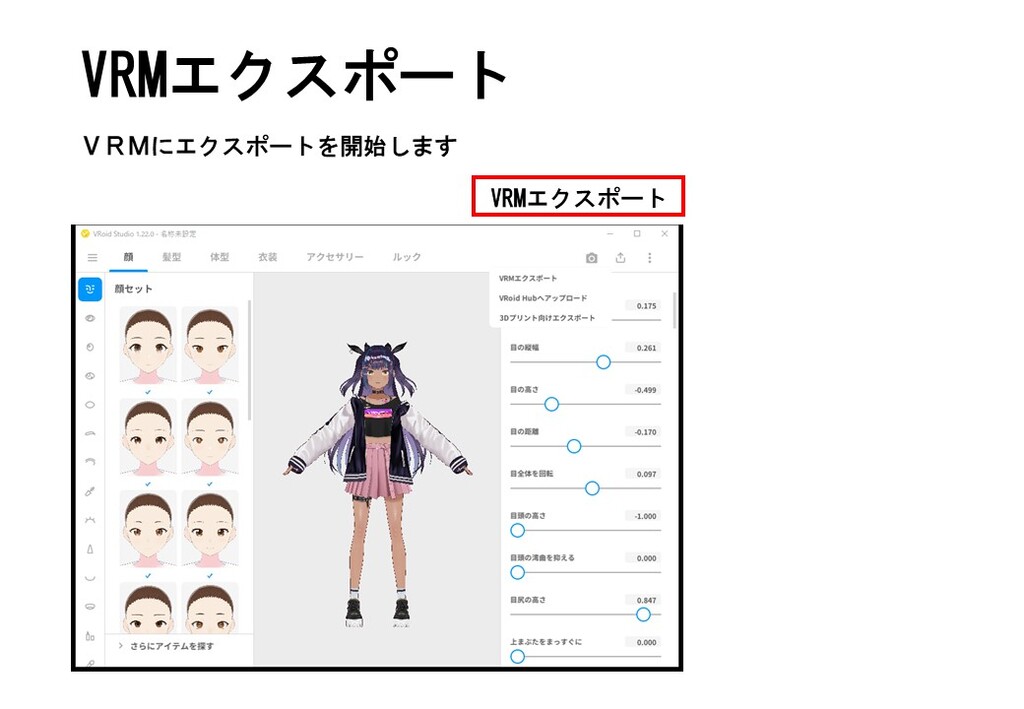
フォーマットの諸域を指定します。
Unity Assetsの入手
下記のアセットを入手します。
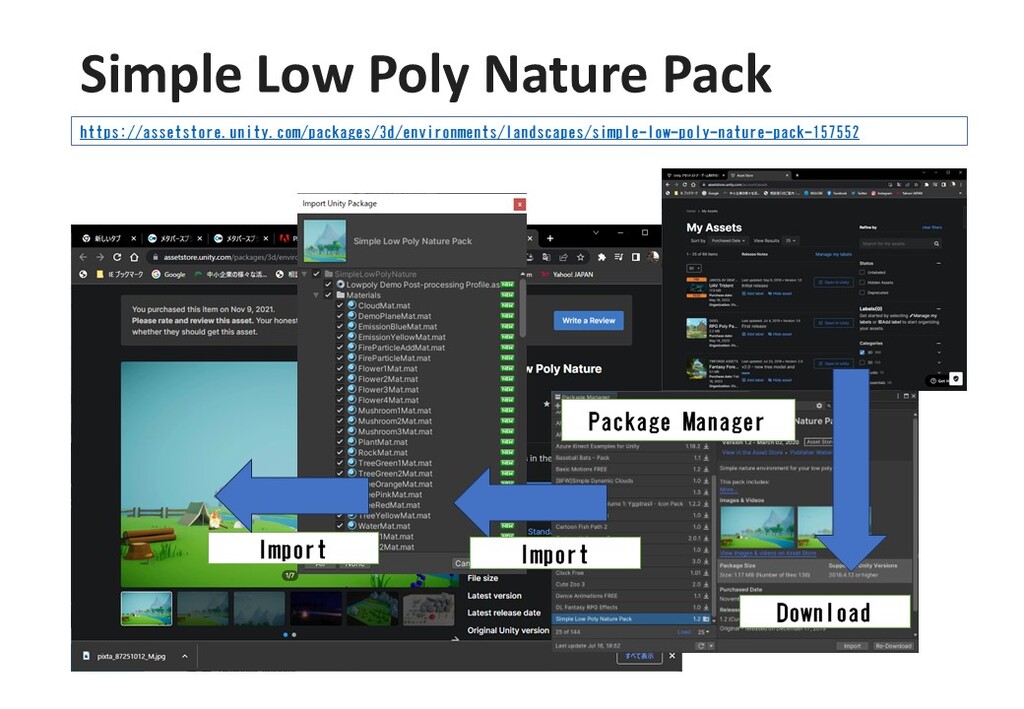
Simple Low Poly Nature Pack
あわせて読みたい
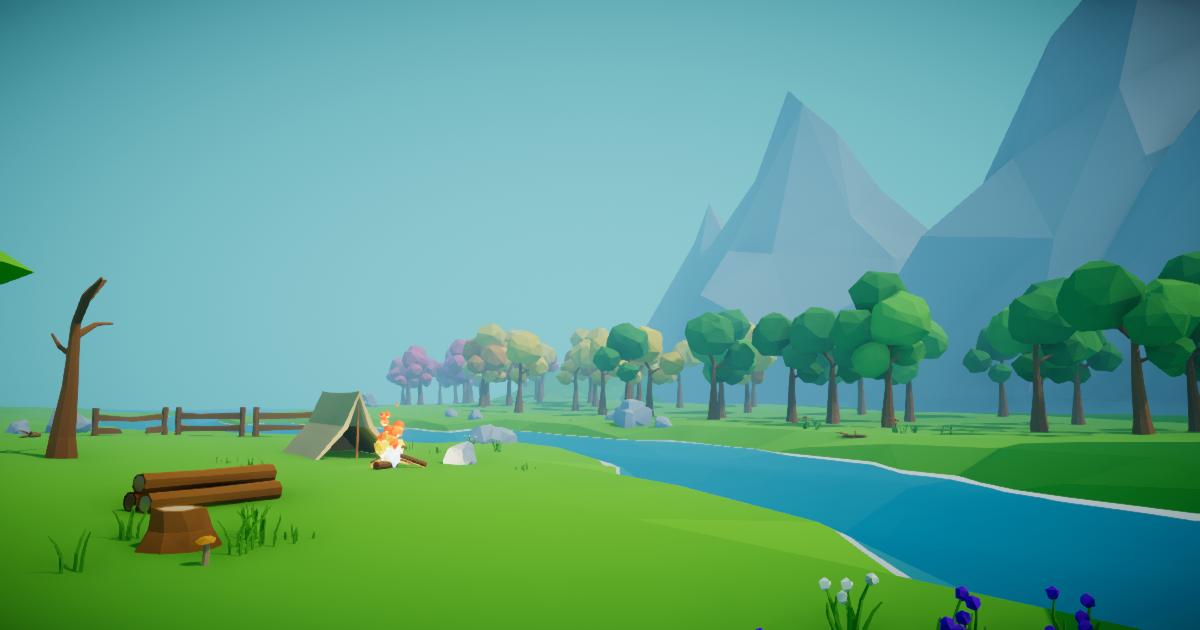
Simple Low Poly Nature Pack | 3D Landscapes | Unity Asset Store
Elevate your workflow with the Simple Low Poly Nature Pack asset from NeutronCat. Find this & other Landscapes options on the Unity Asset Store.
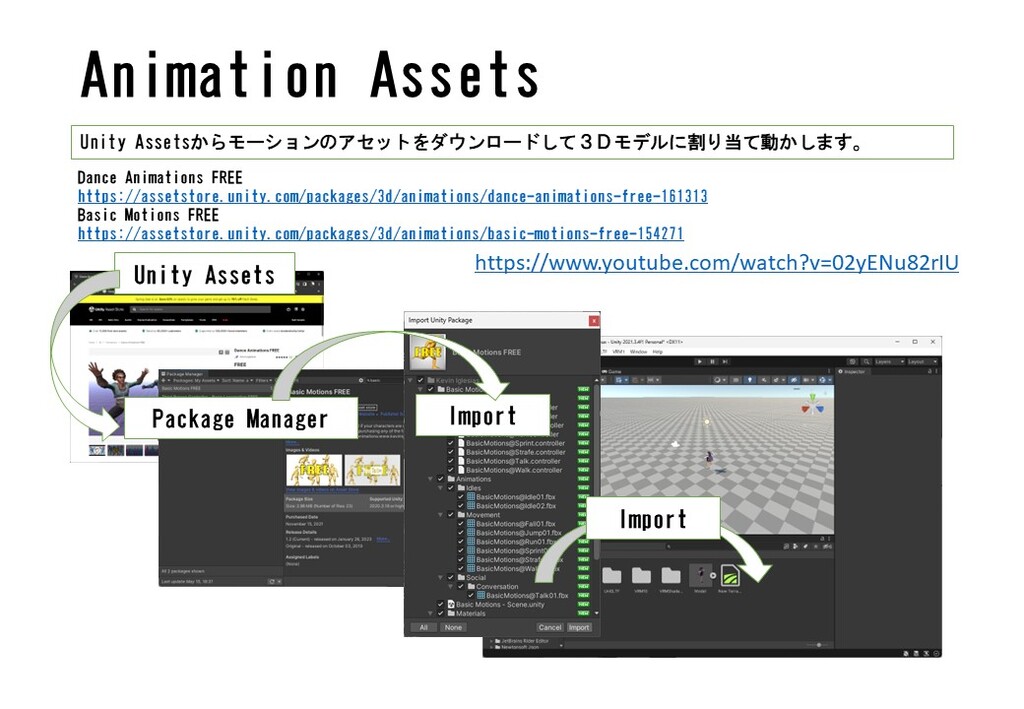
Basic Motions FREE
あわせて読みたい
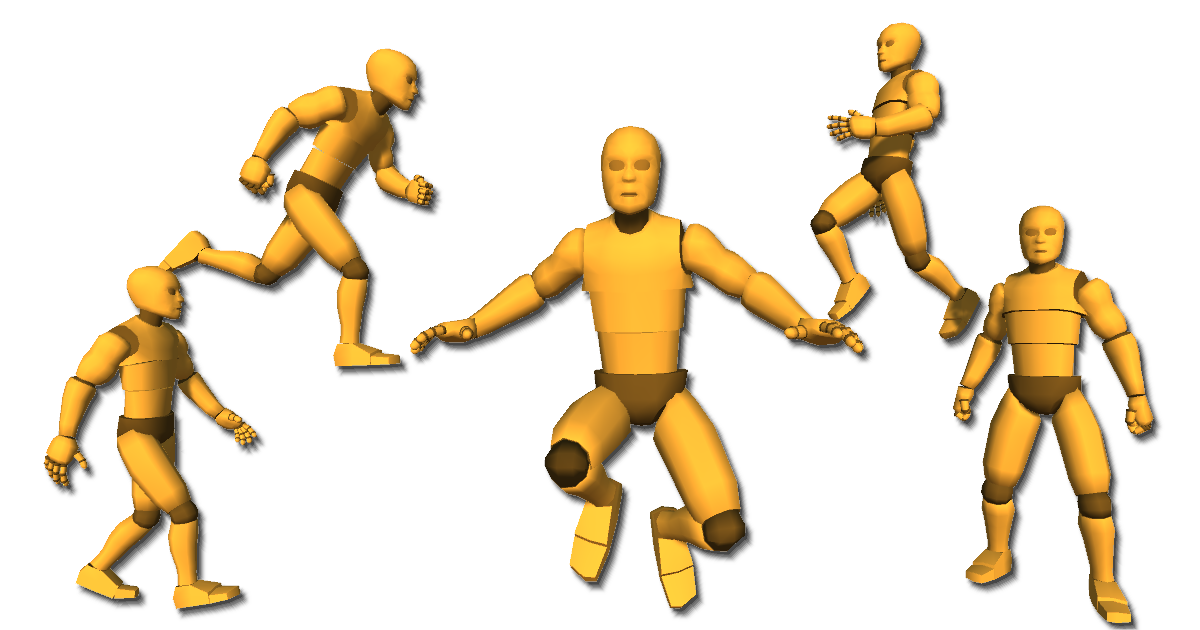
Basic Motions FREE | 3D Animations | Unity Asset Store
Elevate your workflow with the Basic Motions FREE asset from Kevin Iglesias. Find this & other Animations options on the Unity Asset Store.
Unityを起動します
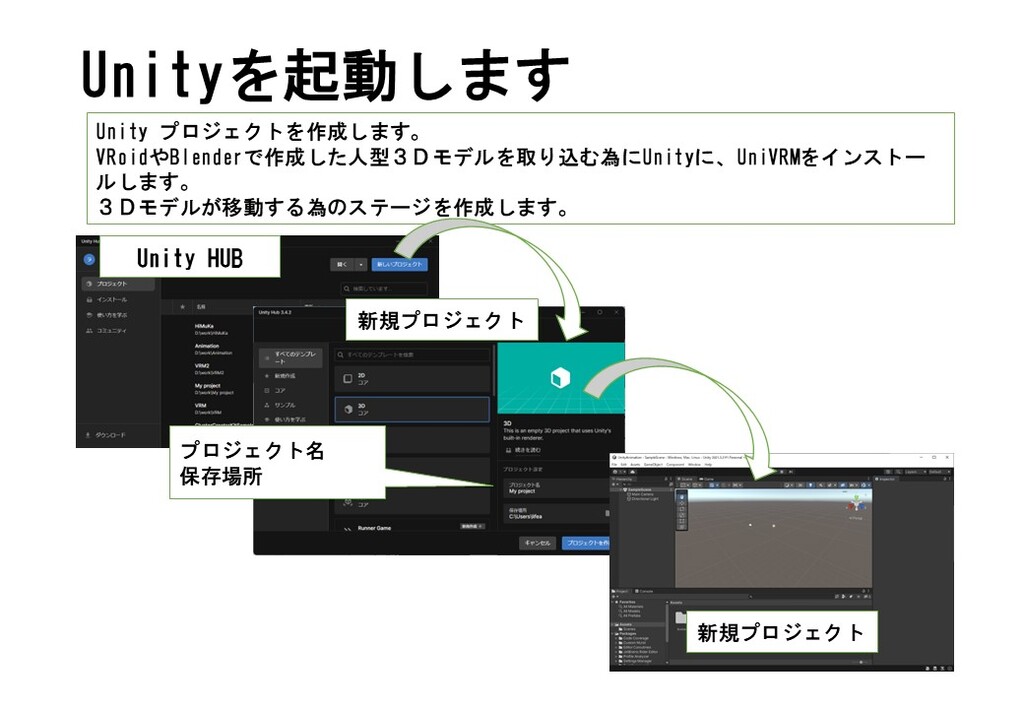
Unity プロジェクトを作成します。
VRoidやBlenderで作成した人型3Dモデルを取り込む為にUnityに、UniVRMをインストールします。
3Dモデルが移動する為のステージを作成します。
UnityとUnity AssetsのID登録
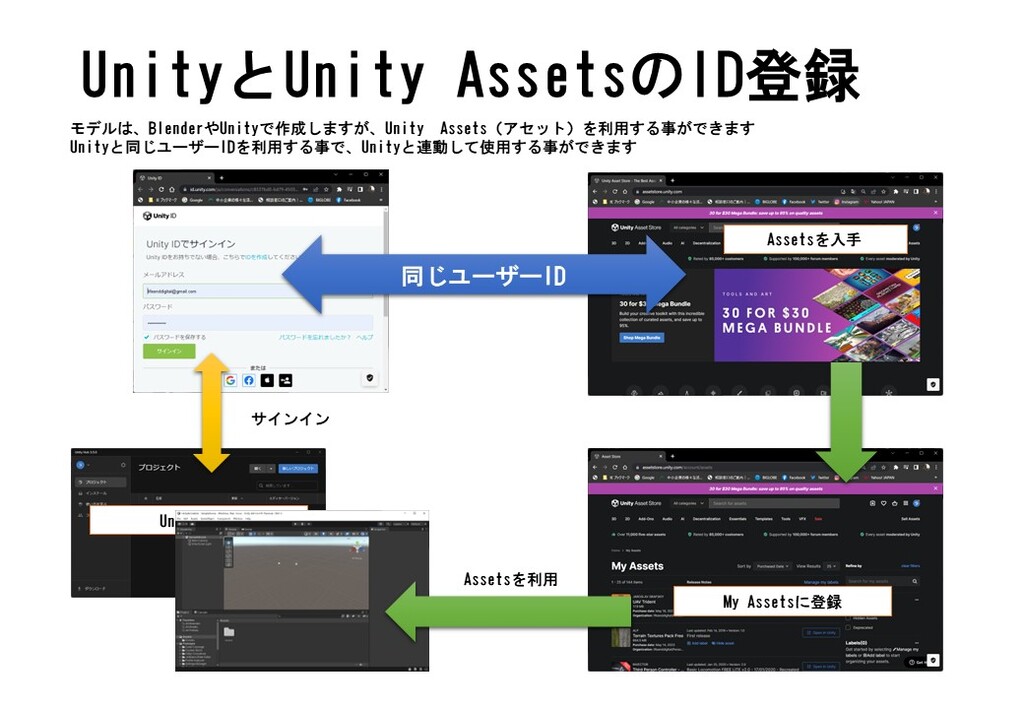
おもなAssets
RPG用パック
Simple Low Poly Nature Pack
https://assetstore.unity.com/packages/3d/environments/landscapes/simple-low-poly-nature-pack-157552

モーションキット
Dance Animations FREE
https://assetstore.unity.com/packages/3d/animations/dance-animations-free-161313
Basic Motions FREE
https://assetstore.unity.com/packages/3d/animations/basic-motions-free-154271

Unity のスターターキット
一人称
Starter Assets - First Person Character Controller | URP
https://assetstore.unity.com/packages/essentials/starter-assets-first-person-character-controller-urp-196525
三人称
Starter Assets - Third Person Character Controller
https://assetstore.unity.com/packages/essentials/starter-assets-third-person-character-controller-196526

地面用テクスチャ
Terrain Textures Pack Free
https://assetstore.unity.com/account/assets
Outdoor Ground Textures
https://assetstore.unity.com/packages/2d/textures-materials/floors/outdoor-ground-textures-12555

制服ユニティちゃん
https://unity-chan.com/download/releaseNote.php?id=TPK-Hmnd-Kohaku_B
Simple Low Poly Nature Packを使う
Basic Motions FREEを使う
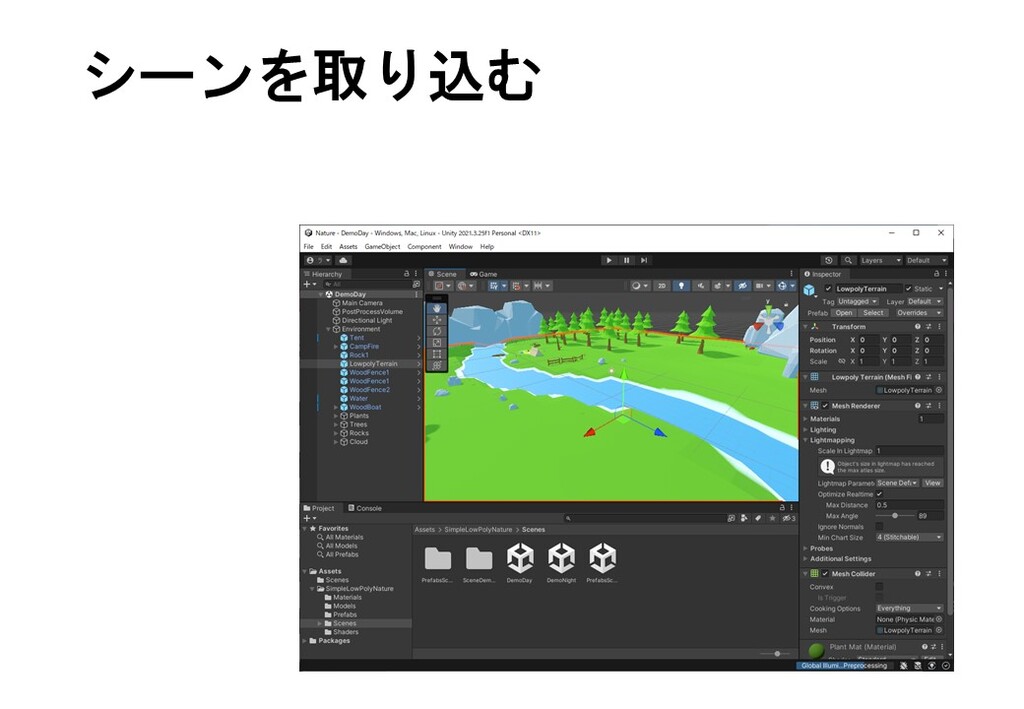
Unityでシーンを作る
UniVRMインポート
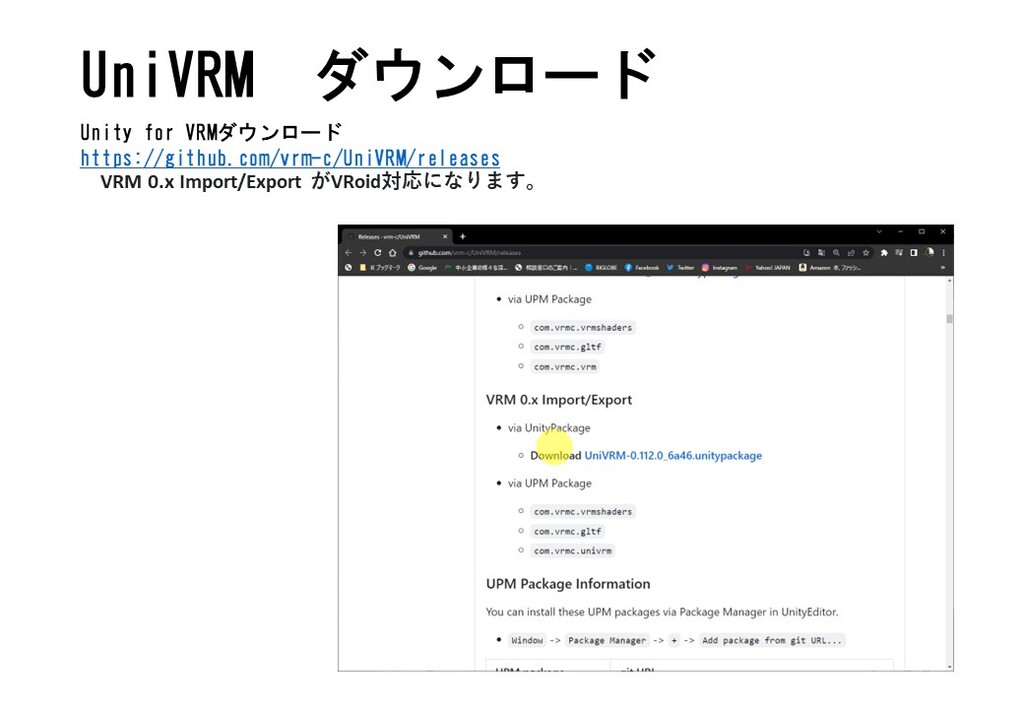
UniVRM ダウンロード
VRM 0.x Import/Export がVRoid対応になります。
GitHub
Releases · vrm-c/UniVRM
UniVRM is a gltf-based VRM format implementation for Unity. English is here https://vrm.dev/en/ . 日本語 はこちら https://vrm.dev/ - vrm-c/UniVRM
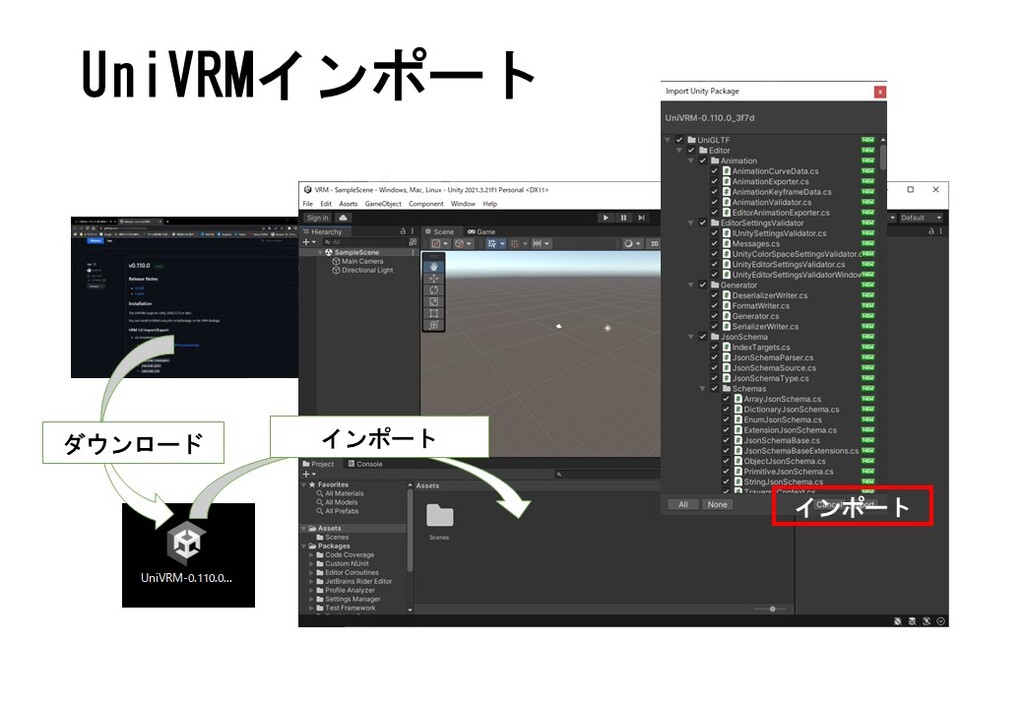
UniVRMインポート
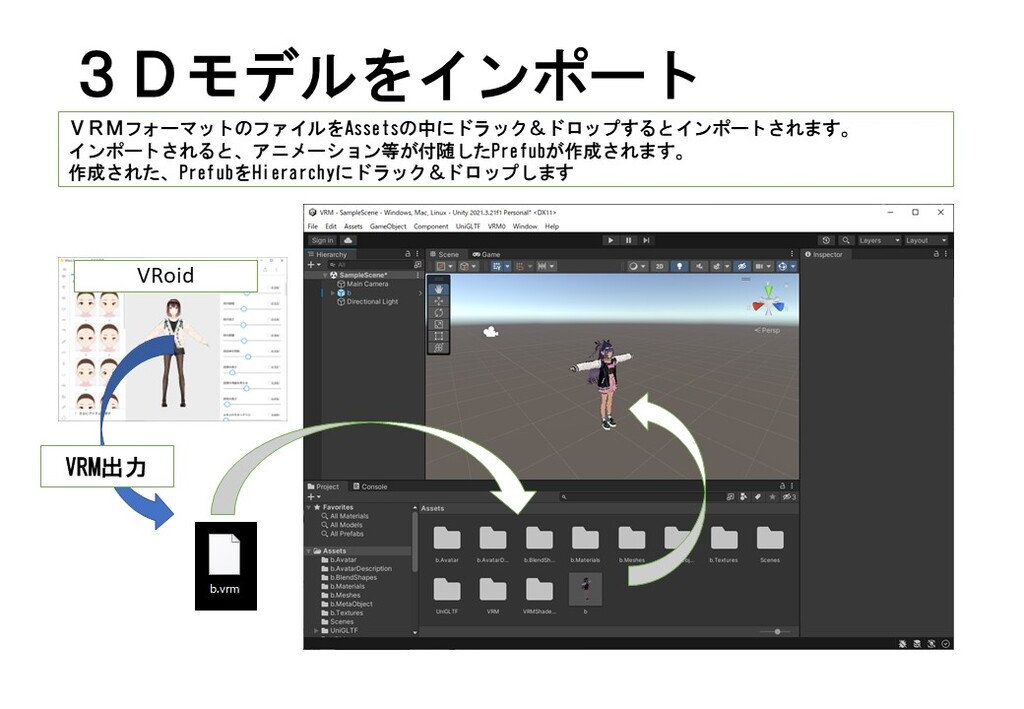
アバターをインポート
VRMフォーマットのファイルをAssetsの中にドラック&ドロップするとインポートされます。
インポートされると、アニメーション等が付随したPrefubが作成されます。
作成された、PrefubをHierarchyにドラック&ドロップします
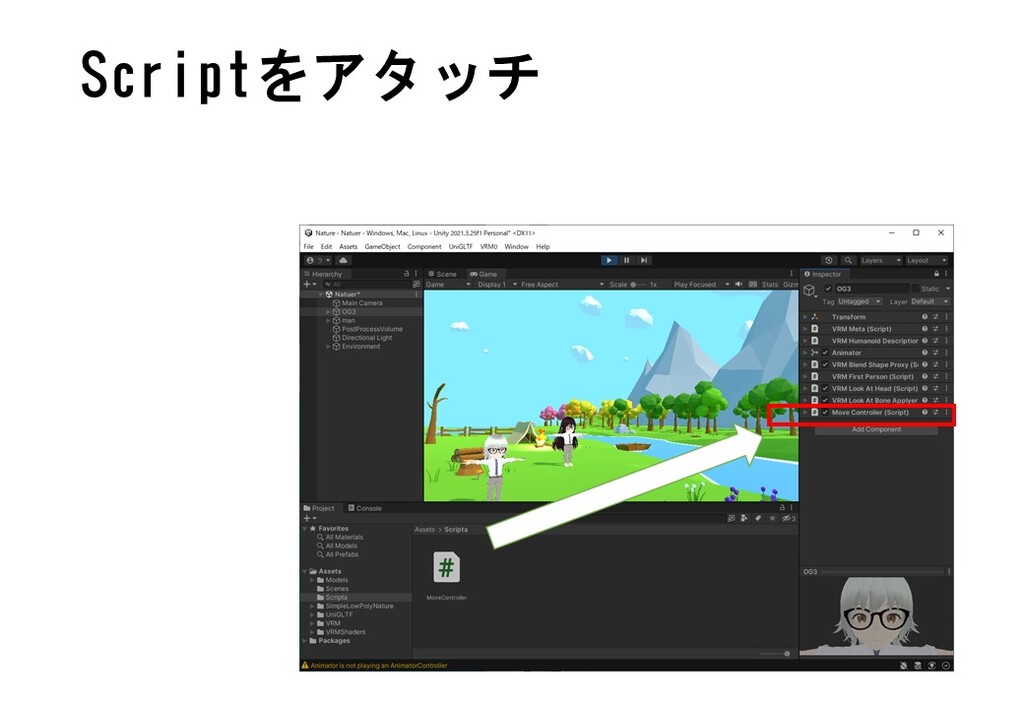
MoveControllerの追加
MoveControllerを作成して、アバターの操作を行います。
WSADキーやアローキーでアバターの移動を行います。
1)Assets にScriptsフォルダーを作成
2)3DObject→Create→C# Scriptでスクリプトを作成
3)名前を”CameraScript”とします
4)CameScript を Hierarchy内の MainCamera へドラッグ&ドロップします
5)スクリプトのターゲットを【モデル名]にします
using System.Collections;
using System.Collections.Generic;
using UnityEngine;
public class MoveController : MonoBehaviour

{
    private Animator animator;
    // Start is called before the first frame update
    void Start()  {
        animator = GetComponent<Animator>();
    }
    // Update is called once per frame
    void Update()  {
        if (Input.GetKey(KeyCode.UpArrow) || Input.GetKey(KeyCode.W))   {
            animator.SetBool("Walk", true);
            transform.position += transform.forward * 0.01f;
        } else {
            animator.SetBool("Walk", false);
        }

        if (Input.GetKey(KeyCode.DownArrow) || Input.GetKey(KeyCode.S))  {
            animator.SetBool("Back", true);
            transform.position -= transform.forward * 0.01f;
        }  else  {
            animator.SetBool("Back", false);
        }

        if (Input.GetKey(KeyCode.RightArrow) || Input.GetKey(KeyCode.D))   {
            transform.Rotate(0.0f, 1.0f, 0.0f);
        }
        if (Input.GetKey(KeyCode.LeftArrow) || Input.GetKey(KeyCode.A))   {
            transform.Rotate(0.0f, -1.0f, 0.0f);
        }
    }
}
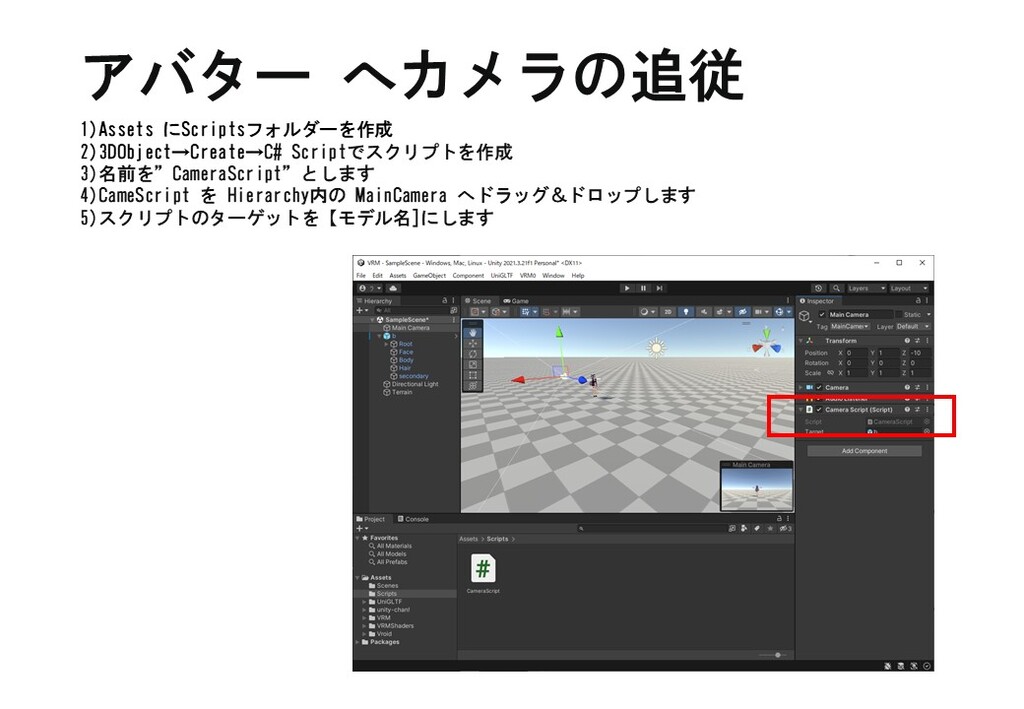
アバター へカメラの追従
スクリプトの作成
 1)Assets にScriptsフォルダーを作成
2)3DObject→Create→C# Scriptでスクリプトを作成
3)名前を”CameraScript”とします
4)CameScript を Hierarchy内の MainCamera へドラッグ&ドロップします
5)スクリプトのターゲットを【モデル名]にします
using System.Collections;
using System.Collections.Generic;
using UnityEngine;

public class CameraScript : MonoBehaviour
{
    public GameObject target;
    private Vector3 distance;

    // Start is called before the first frame update
    void Start()
    {
        distance = transform.position - target.transform.position;
    }

    // Update is called once per frame
    void Update()
    {
        transform.position = target.transform.position + distance;
    }
}
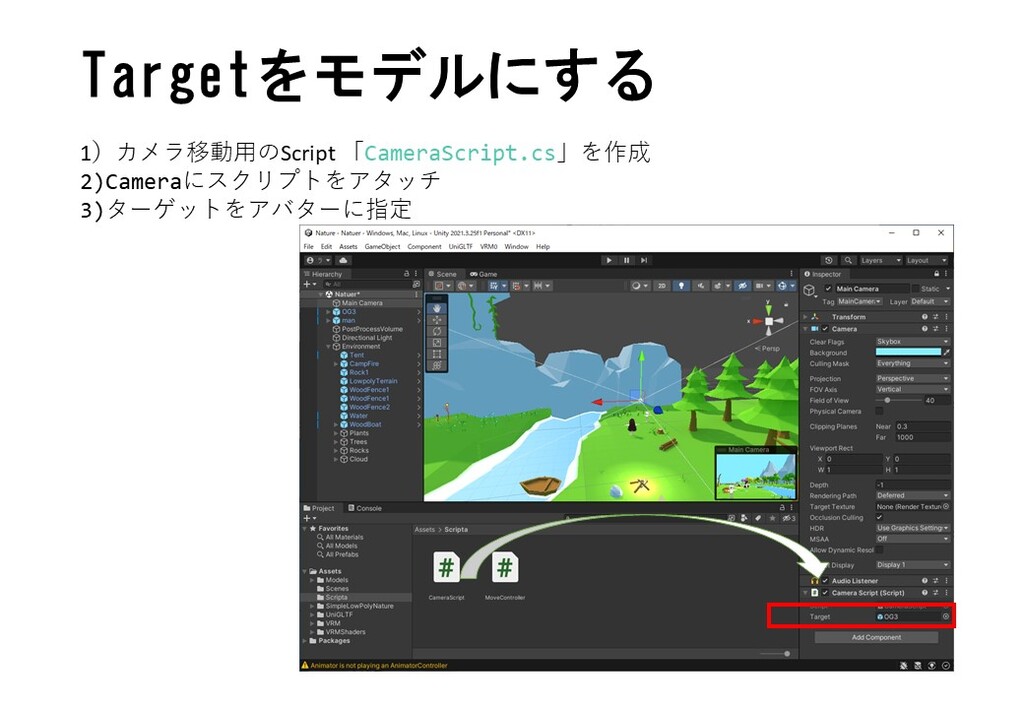
TargetをモデルにするTargetをモデルにする
モーション追加
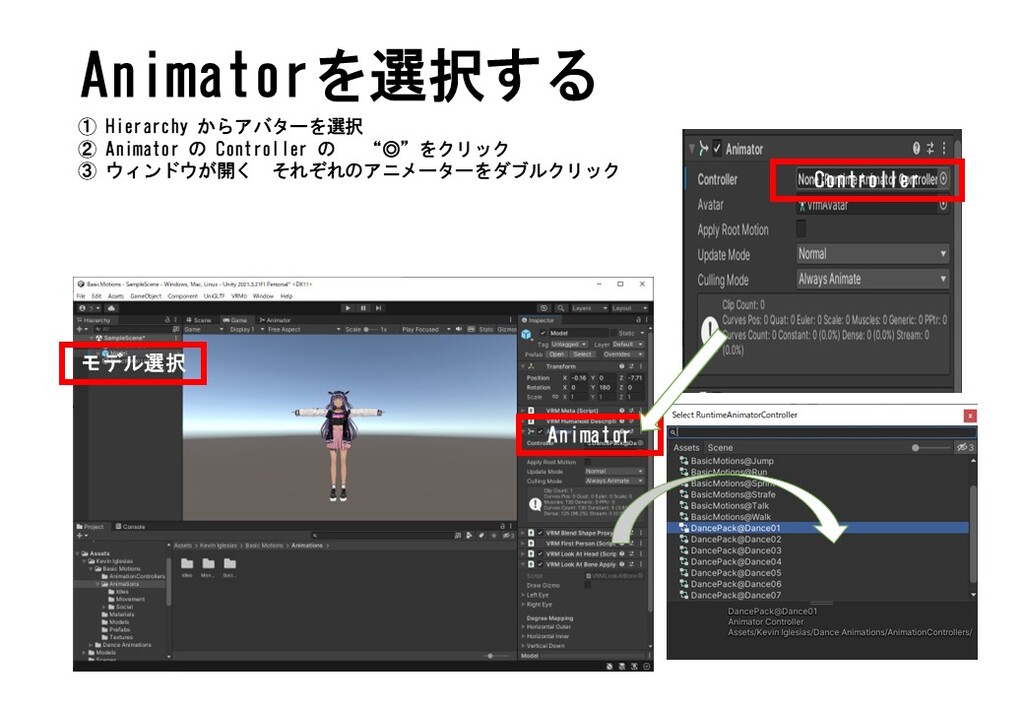
Animatorを選択する
モーションの切り替え
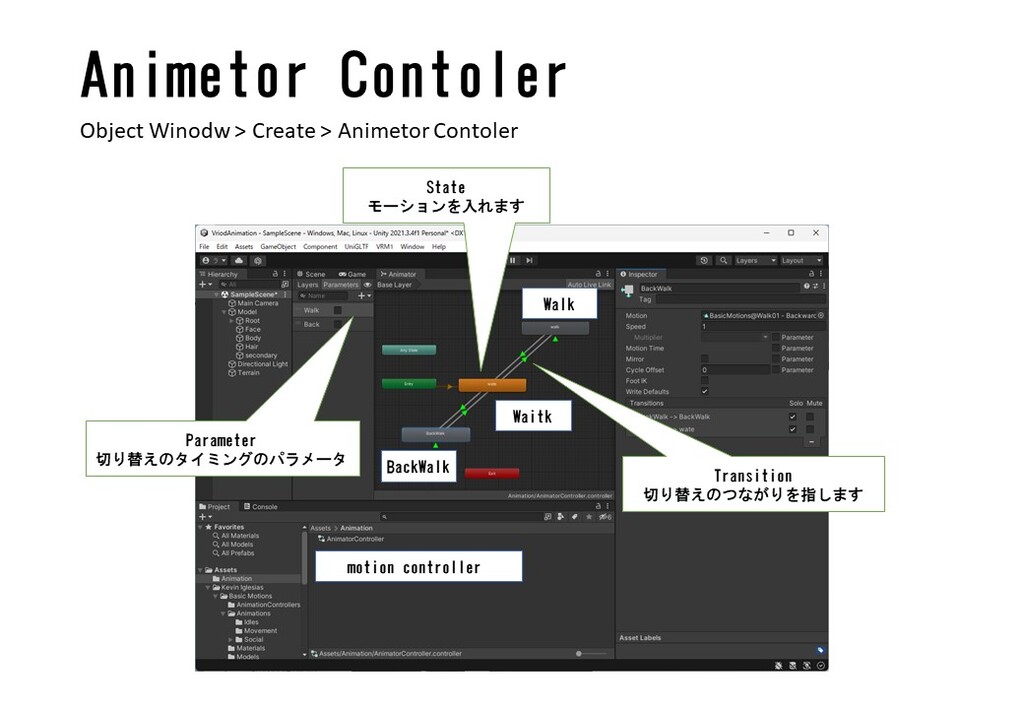
Animetor Contoler
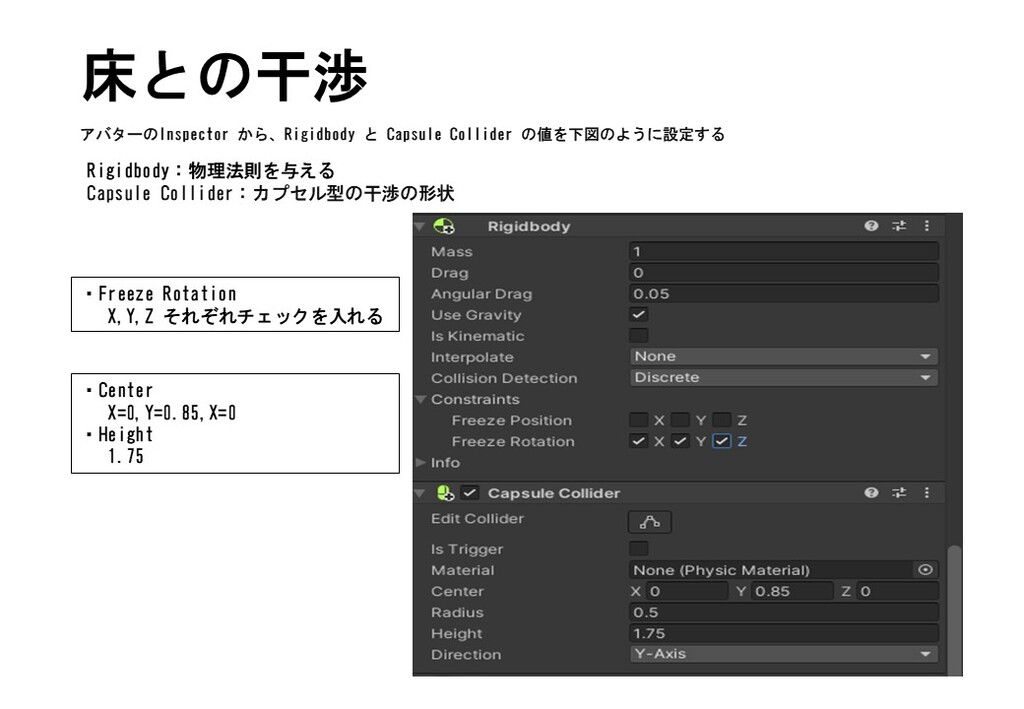
床との緩衝
Rigidbody:物理法則を与える
アバターに物理法則を与えます。重力の影響を表現しますので、支えがないと自由落下します。
Freeze Rotation: X,Y,Z それぞれチェックを入れる
Capsule Collider:カプセル型の干渉の形状
自由落下するアバターが地面にあたる(干渉)する事をチェックして落下を止めます
Center : X=0,Y=0.85,X=0
Height:   1.75
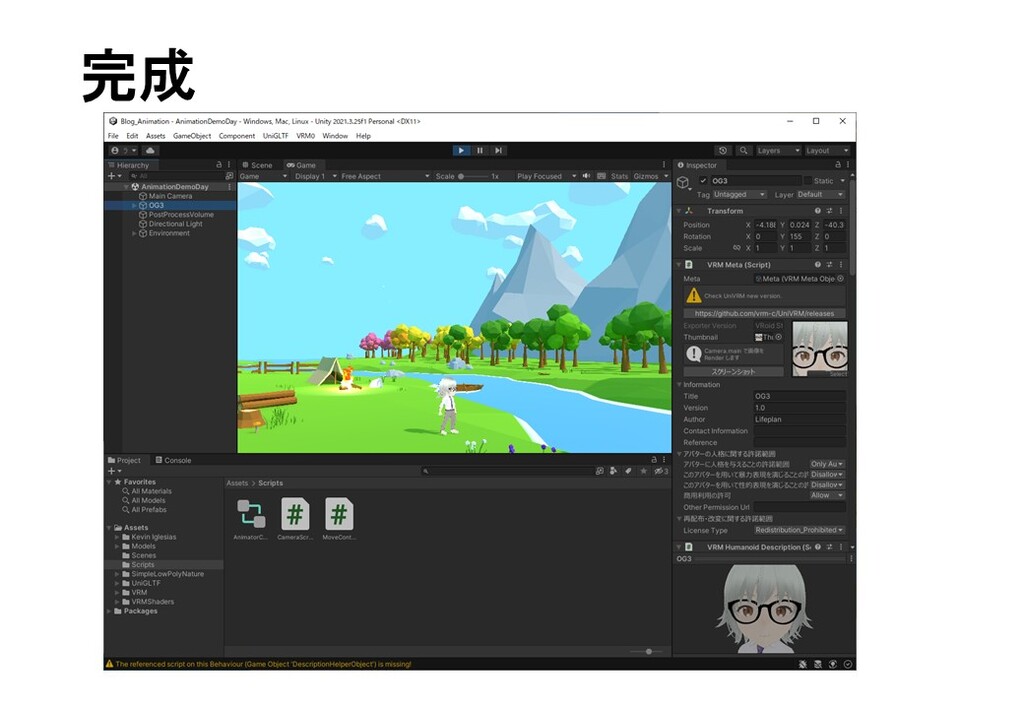
完成
コメント